I had the honor of being the first Design Team member for Gina's Designs to play with the new bagatelle boxes. This was so much fun. Each box is individual and notches together easily. These boxes are made of wood, not chipboard, and are very sturdy. I used plain old inexpensive white wood glue to glue them together. Once you have them glued together, the fun begins and you can arrange them any way you please. Below are a couple of different configurations I played around with. The starter set comes with 12 boxes, 2 in each of six different sizes. You can also purchase add-ons if you would like a bigger finished project, or use fewer boxes and make two. You can also configure these boxes to form a square or rectangle rather than a free-form shape, although you may need to use more or less than the basic starter kit to form that shape.
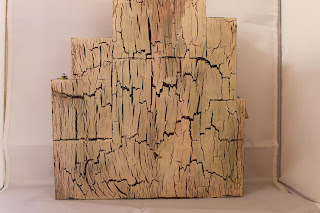
After I glued my boxes together and figured out which configuration I wanted to use, I used hot glue to attach the boxes to each other. I think it would better to use wood glue, but I was in a hurry that day :) The hot glue works, but you have to be very careful to get your boxes even the first time if you use the hot glue. After my boxes were glued together, I chose to cover the seams with Tim Holtz tissue tape. It was so easy to use! I then painted the back and sides with a crackle finish. I like to use the white elmer's glue method of crackle painting because it's cheaper and quicker. You can dry it with your heat gun, and you'll be done in a jiffy. I papered the inside backs of each box, and this is what I ended up with:
Now for the finished project!!!! I had a lot of help filling the cubby holes from my BFF Susan who used to be a miniatures artist. She had so many cute items in her stash including the collectible Avon figurine thimbles. I just love the end result!
Creating Cards for Eileen Hull Designs
2 weeks ago

.jpg)










Wow - How fun! I love how you did the crackle and how you used the tissue tape... thanks for the inspiration!
ReplyDeleteLove how this turned out. I love the crackle too!
ReplyDeleteWow, Nancy, ich staune, was du aus den Kästen für ein bezauberndes Kunstwerk geschaffen hast. Es ist mit so vielen wunderschönen Sachen dekoriert, das ist großartig!
ReplyDeleteLiebe Grüße, Bärbel