Today I'm sharing an altered inverted 8 x 10 canvas that I created in a fun Steampunk style. The adorable image and the papers behind it were digital freebies from Ephemera's Vintage Garden. I thought that the Steampunk chipboard shapes from Gina's Designs really complimented this image. I used the techniques described below on the chipboard shapes.

The butterfly, the hot air balloon, and the gears corner at bottom right were first given a light coat of gesso. I always use a light touch with the gesso, usually just a dry brushing with a fan brush, because I like the natural shading it provides when some of the natural chip color is coming through. I then used a variety of different colored gelatos on the butterfly. I blended the colors with a touch of water then let it dry. To get the distressed and grungy look I was after, I sanded it back so some gesso showed through. I followed that with a touch of Prima chalk ink in a burnt orange color. By that point you couldn't even tell that I'd ever used the gelatos, but that's OK because with each layer of color you add, you'll get more depth and dimension as an end result. I added a bit of stickles here and there, some bead connectors and I coiled some copper wire for antennae.
On the balloon, I stamped a script stamp with perfect medium, then added shades of perfect pearls. It has a beautiful sheen to it that doesn't show in the photos. For the balloon overlay I embossed with copper embossing powder, sanded some of it off, then touched it up with Prima Chalk Ink in burnt orange.
For the gears, I simply ran it through my Big Shot in a dry embossing folder, then rubbed it with different shades of Gilder's Paste.
For the chipboard Word Ribbon Title of "Explore", I rubbed the raw chipboard with Prima Chalk Ink in the burnt orange shade, added a touch of Tim Holtz tarnished brass Distress Paint then rubbed gesso over the letters.
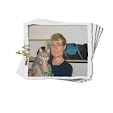
To add texture to the image itself, I used a grungy edge stamp with shabby white embossing powder to make it look like ocean foam, and then I added some amber frosted flat back pearls.
To add texture to the image itself, I used a grungy edge stamp with shabby white embossing powder to make it look like ocean foam, and then I added some amber frosted flat back pearls.
To create the texture on the frame of the inverted canvas, I began by using matte Mod Podge to apply torn papers in colors to match the project all around the frame covering the staples. I then dry brushed gesso over the paper using a light touch. I followed with some Art Anthology dimensional sorbet paint applied through a stencil all over the frame. I trimmed in some of the blank spaces with Tim Holtz distress paint in tarnished brass to highlight. I added gel medium and applied glass beads and some little stones (lower left corner)
I made the grungy flower at left with the spikey shapes of the Tim Holtz Tattered floral die (I cut two), and in the center I used a Sizzix daisy die (I cut two), and punched out sun shapes for the center (I punched out three), then I added some glass beads. The flower at right is just a simple rolled rose by Die-namics.
Thanks for looking!
Gina's Designs Products Used:


Nancy - this is so phenomenal! I LOVE it! Love reading the details you wrote of the processes. The colors are outstanding. A real eye catcher. Fabulous job!
ReplyDelete