Showing posts with label nature inspired. Show all posts

Tuesday, July 15, 2014

Artist Trading Blocks for Gina's Designs

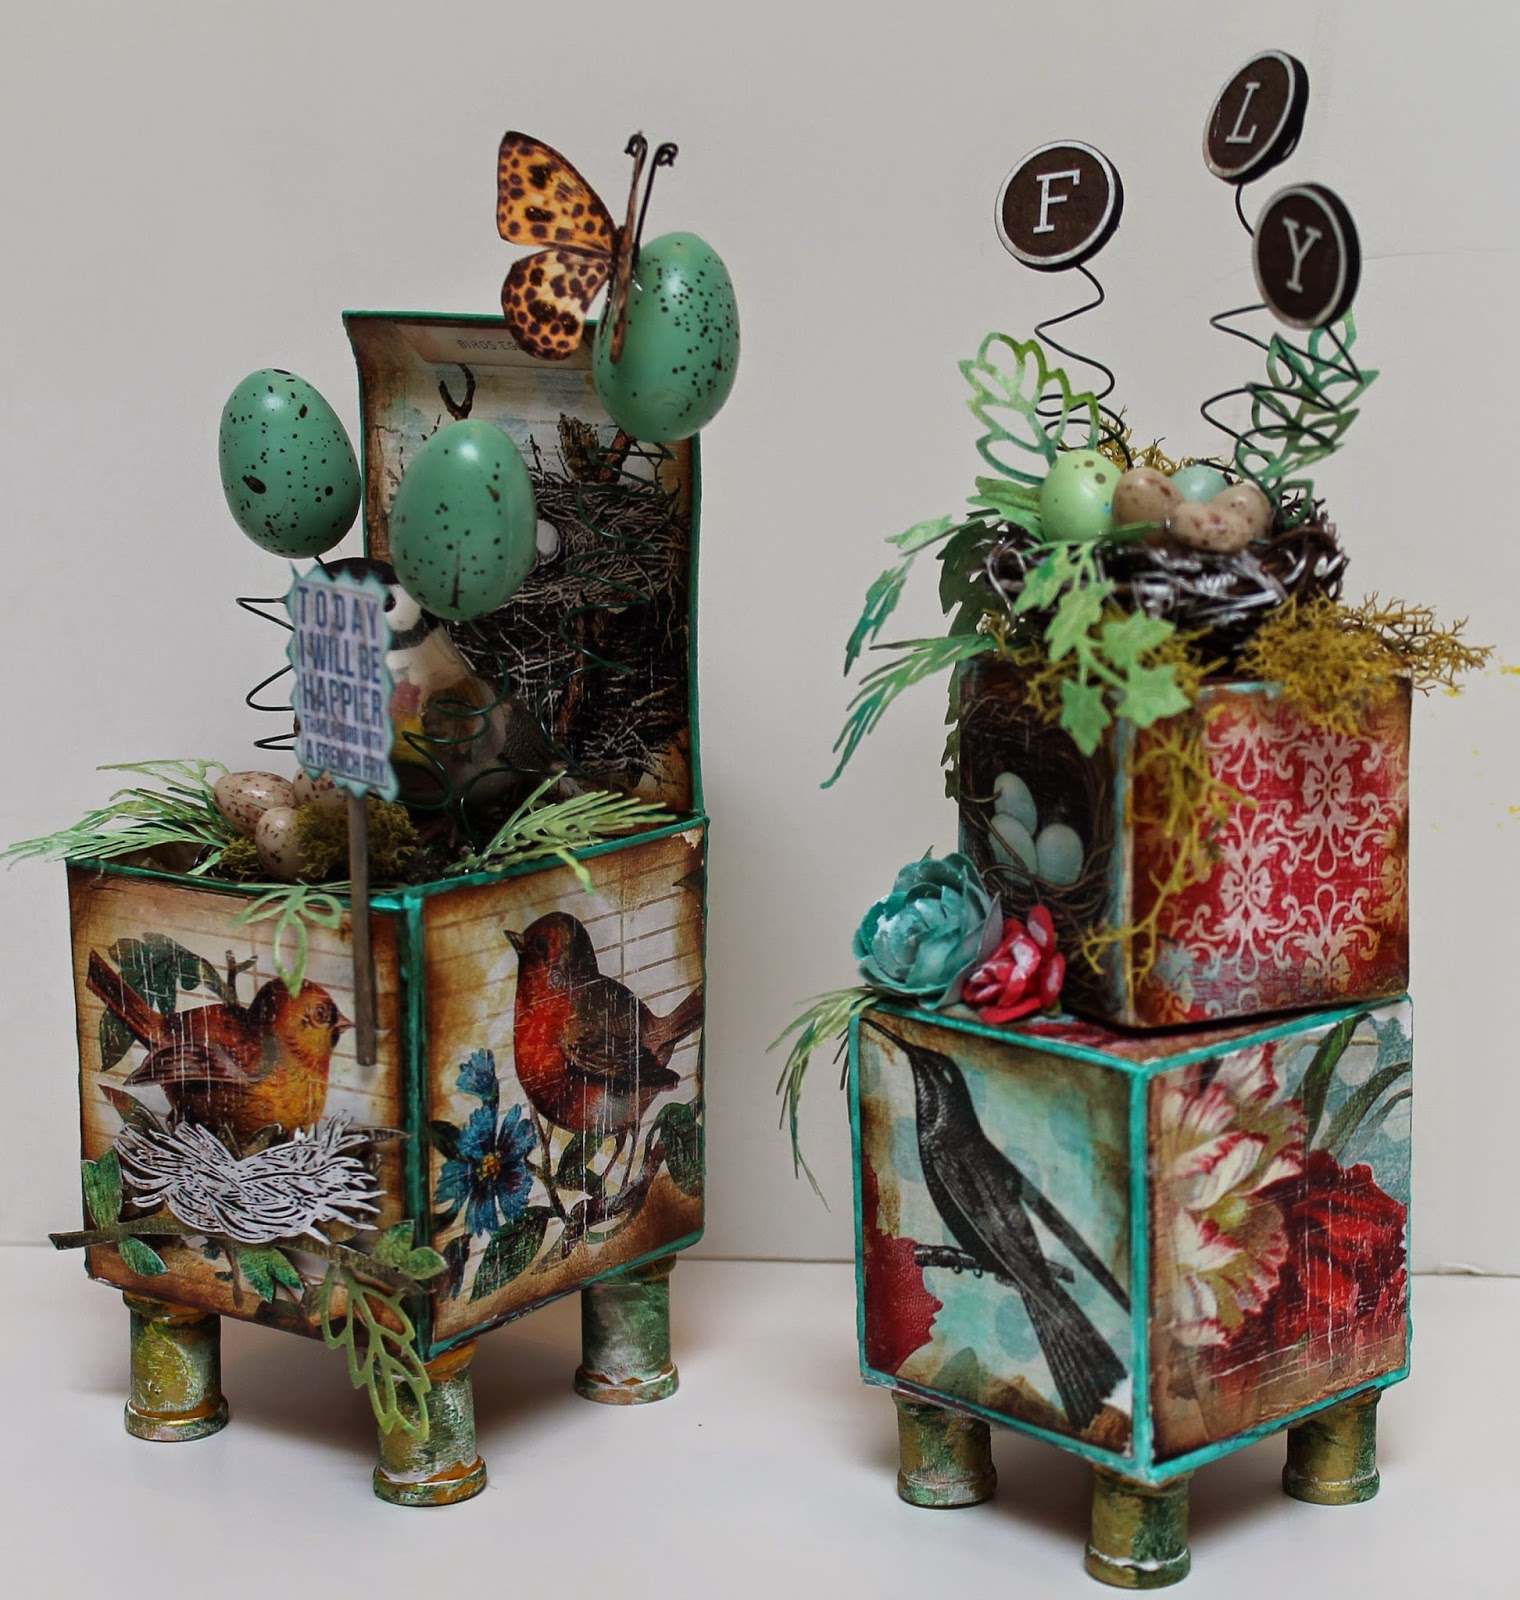
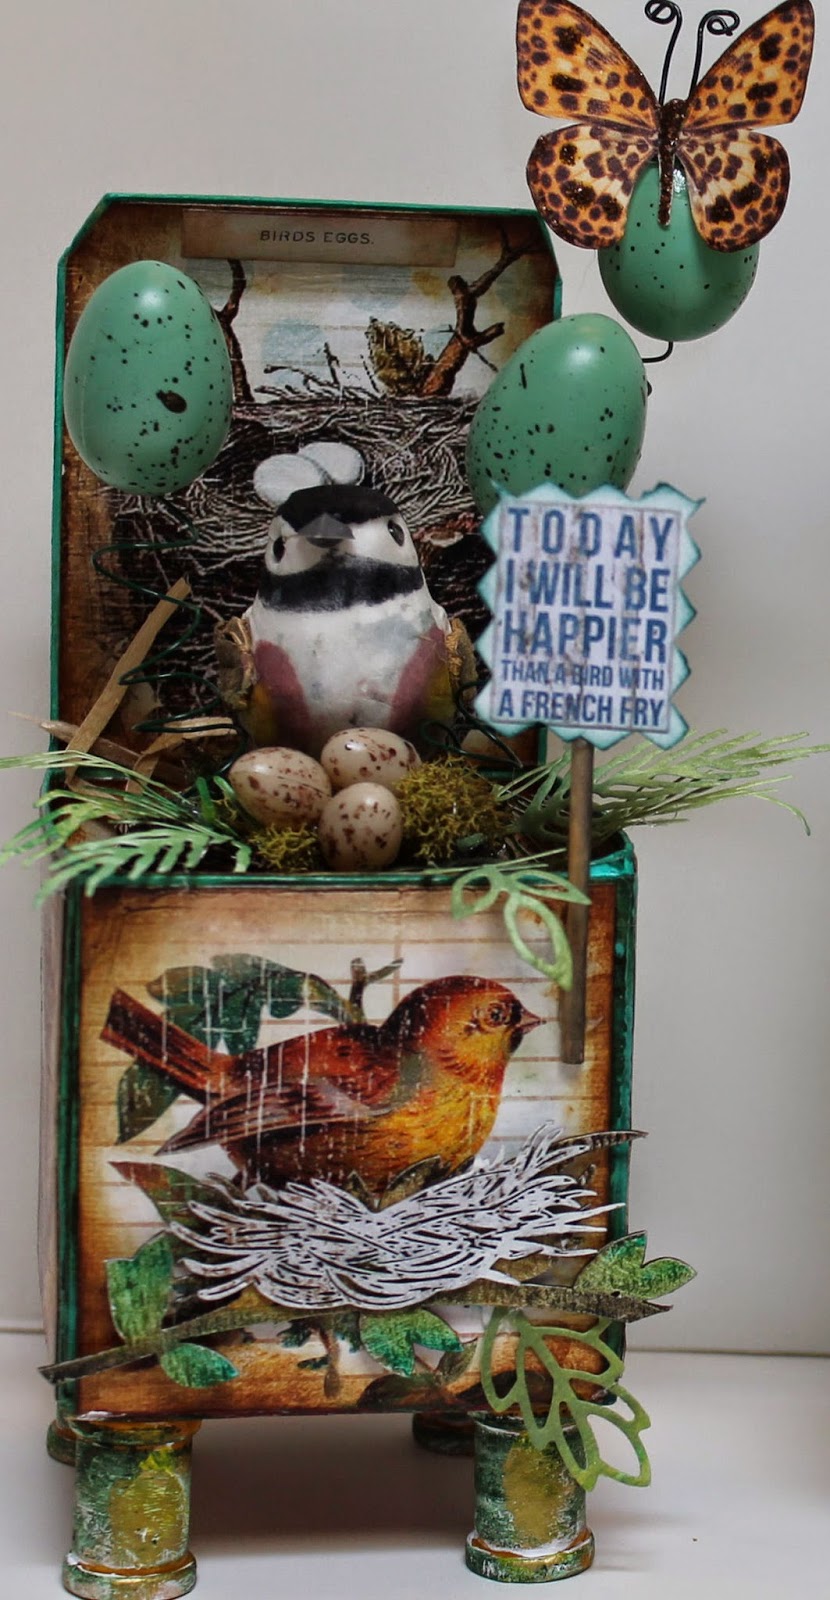
Hello Friends!  The team at Gina's Designs have been sharing these Artist Trading Blocks all this month, and it's been amazing to see all the different versions of these fun and versatile blocks.  I decided on a bird theme for mine.  I used the large block separately and left the top cover open,  and I stacked the smaller ones together.  The blocks are made of chipboard and come ready to assemble using the pre-scored fold lines.  I used red line tape to assemble my blocks.  Once assembled,  I covered the blocks completely with gesso to help build a firmer and sturdier surface.  I also "frosted" over the seams lightly with modeling paste and a painters spatula, then I painted and inked the edges.  I used matte Mod Podge to apply the paper, and I also put a heavy coat of the Mod Podge on top of the paper.   My end result were blocks that are very solid and sturdy like wood!

I chose digital papers in a colorful bird theme from Ephemera's Vintage Garden to cover my blocks.  I love the vivid images of birds and nests!  For the feet, I glued wooden spools to the bottom of the blocks then painted them with gesso followed by Tim Holtz dabber paint in copper.  I toned that color down with Gilder's Paste in Verdigris and in Patina.  I also rubbed on some extra gesso to further distress the feet.


  Following the prep work, I had a lot of fun decorating my blocks with  3-D birds, nests and eggs from the floral dept. at JoAnn's to complement the images on the design papers.   I felt that I needed some greenery so I die cut vines and ferns, and then I coiled some green wire by wrapping it around the handle of a large artist's brush and attaching it to the bottom of my bird nests on both blocks.  To the top of the coils I added eggs on the large block and the letters "FLY" on the smaller set.


Gina's Designs Products Used:

Other:
Design Paper by Ephemera's Vintage Garden -  Spring Chic Collection
Vine Die by Marianne Creatables
Fern and Leaf Die by Marianne Creatables
Leopard Butterfly by Renea Bouquets


Tuesday, May 20, 2014

Altered Birdhouse for Ephemera's Vintage Garden

I really enjoyed altering this unfinished birdhouse I purchased at Michael's.  It's so exciting to watch the transformation.  This is a Creative Team Project for Ephemera's Vintage Garden, and my second project using the Spring Chic Digital Paper Pack.  These papers are just gorgeous, and the images so clear and bright!


Print these digital papers as many times as you need to complete your project, and even to create matching home decor projects.  The papers are designed to make creating handmade journals easy, but you can use them in any other application, just as you would any other design paper.  I like to create my own flowers to coordinate with my project by printing the design on two sides.  I run the paper through my printer on one side then flip it over and run it through again with one of the other designs on the other side so you get a mix of colors when you create your flowers.   Head on over to Ephemera's Vintage Garden, to check out the gorgeous papers, and sign up for some amazing freebies HERE

Design paper by:

Other supplies used were various flowers from my stash, a Prima nest, a dragonfly by Renea Bouquets, and the trim at the bottom is laser cut chipboard from Gina's Designs.

Thanks for looking!


Wednesday, May 14, 2014

Bird House Wall Hanging

Today I am here with a really fun to decorate wall hanging by Gina's Designs.   These birdhouses can be embellished in any theme you like.   I really love anything with a nature theme,  so I ended up creating a project with a natural outdoorsy feel.  I hope you like it!


I also incorporated one of the newest pieces from the store, the birds on key wall art, to add something special to my project.  The birds on key is also available in a set of smaller sizes.  Everything is attached with a long 2 inch wide strip of burlap.


Other:


Kaisercraft Limelight Collection papers and diecuts

Tuesday, March 25, 2014

Whimsical Mushrooms ATC Display Tray

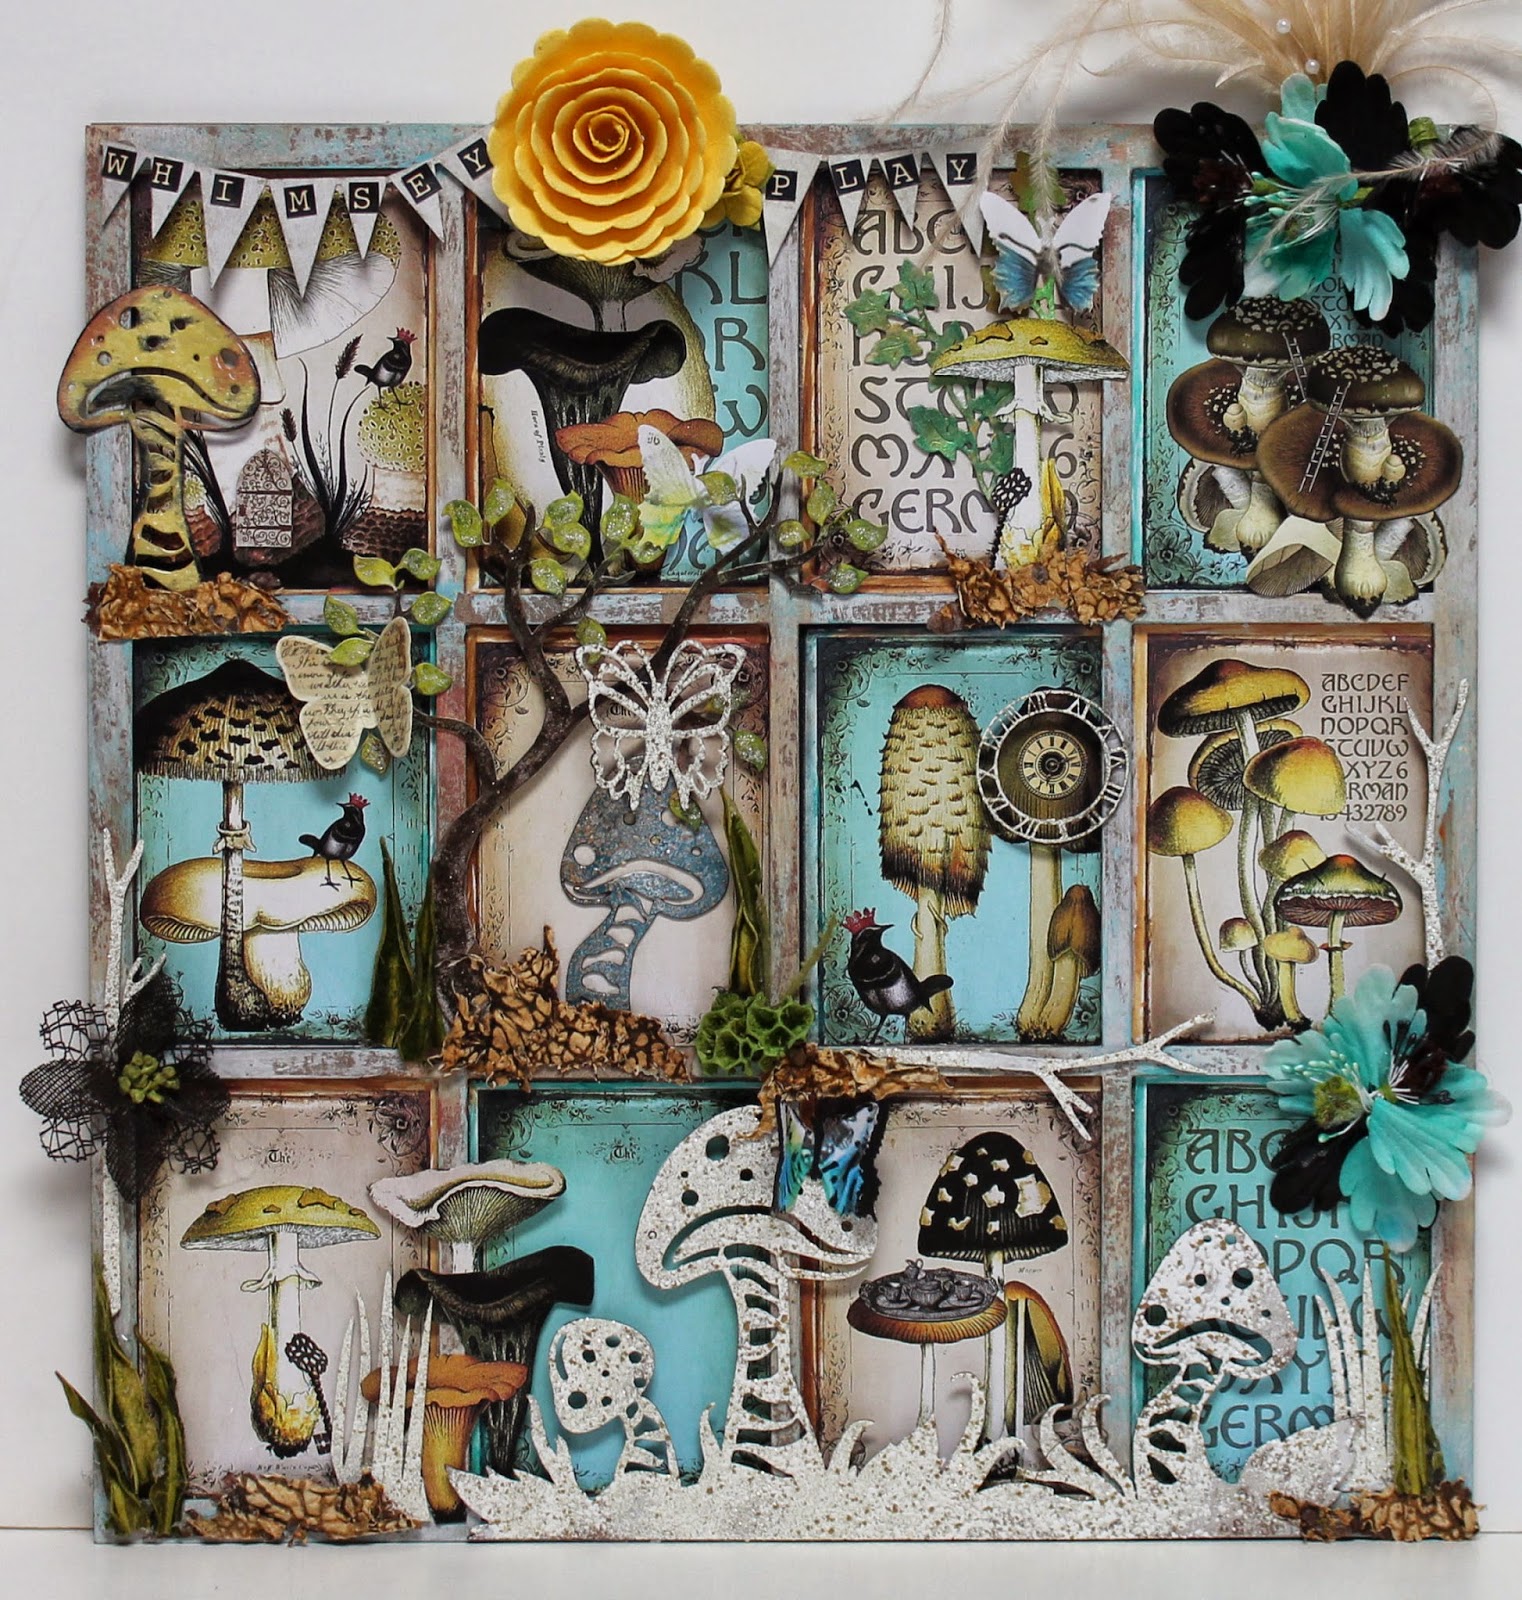
Hi everyone!  Today I'm sharing this ATC Display Tray by Gina's Designs.  I love all things nature inspired, and when I can add more than a touch of whimsy to the project, then that's all the better!  When Gina designed these chipboard mushroom shapes, I knew I needed to have them.  I had lots of ideas on where I'd use them, and when I came upon this amazing mushroom paper by Ephemera's Vintage Garden, perfectly sized for ATC's, I knew it would be a match made in Whimsy Heaven.  Naturally, this Display Tray is a perfect way to display your ATC's, but I had fun embellishing all the little squares, and creating a different adventure in each one.   Thanks for looking!

Gina's Designs Products Used:

Sticks and branches from various pieces

Other:
Prima Flowers
Stampendous shabby embossing powders
Various dried items and feathers from my stash


Saturday, March 8, 2014

Altered Canvas in a vintage garden theme

Today I'm sharing one of my favorite themes again.  Nature!  Somehow for me, it's the theme that comes most easily, and gives me the most pleasure in creating.  I began with a simple application of gesso to the frame, then streaked it with some various colors of Folk Art acrylic paints.  When the paint was dry I added some Kroma Crackle.  This crackle product can take a couple of days to "cure" and finish crackling, so I just leave it and move on to other projects.  When it fully "cured", I rubbed on some Prima chalk inks in various colors to bring out the crackled finish.  I found a nature collage style of design paper in my stash that I'd picked up at Michael's, and I secured it to the back of the canvas with mod podge.  Now comes the fun part.  I began to gather my chippies and to ink, emboss and crackle them.  I looked through my "nature" stash and found nests, birds, eggs and mosses.  After that it only took an hour or so to decide on my final arrangement and to adhere the pieces to the canvas.  The gorgeous butterfly is by Renea Bouquets on etsy.


Gina's Designs Products Used:

Chipboard pieces have been colored with Prima Chalk Inks.  These are a great tool for coloring.  If you buy the big set you will have plenty of colors in the same family to use for shading.

Tree 3 ( a portion of the tree can be seen on the inside)
Topiary Trees (basic instructions are below the post on how I colored it)
Build-a-Layout Country Living (the wagon wheel) crackled with TH distress rock candy crackle paint
Ornate Corners (inner corner top right)
Fall Shape Set (the rake) colored with chalk ink then TH distrees embossing powder to look like rust

Coloring the Topiary:

I began with a light dry brushing of gesso followed by Prima Chalk Ink.  I "shaded" the pot by leaving the thinly coated white gesso uncolored in the center to give it a rounded look.  For the topiary, after I colored with shades of green chalk ink, I added some clear glass bead gel and left it to dry.  It will dry clear.  At that point you will have lots of texture from the beads that will be stuck to the chipboard.  I then rubbed on some Gilders Paste in Vertigris over the beads and along the edges.  Done!

Monday, November 25, 2013

Nature Inspired Altered Spool with Photo Tutorial

These spools by Gina's Designs are so much fun to decorate!  They are large spools and there is plenty of room to play with.  I wanted my finished spool to be nature inspired, and the end result was exactly what I'd had in mind.   I have created a step by step photo tutorial and you will find it following the photos of my finished piece.  The tutorial will show you how I created a  simple and dimensional faux bark look to the center of the spool.  I hope you like it!

Here is my finished spool:


Step by step faux bark tutorial:

In step one I have drawn lines of hot glue onto the spool center to simulate a tree pattern.  I grabbed a tree bark rubber stamp from my stash to get an idea of the pattern I would use.  It took just a few moments to draw on the hot glue.  Be sure your glue gun is nice and hot. My glue gun is the fine-tipped variety and I used the high temperature setting.  It took 3 of the fat glue sticks to achieve this.

In step two I painted it with two coats of white gesso followed by gloss enamel paint in light buttermilk.


In step three I used some ink sprays in nature colors to define the raised areas.


In step four I still wanted more definition so I  rubbed on some Lumiere metallics with my finger to further define the raised areas.  I followed that with a clear pearlescent spray for shine


In step five I covered the surface with thick coat of distress crackle paint in clear rock candy


Here is a close-up of the finished product


Although I did not do a tutorial on the rest of the spool, I will show you and explain some of the steps below:

Before attaching the top and bottom disks to the center piece, I first painted the two disks.  I used the same white gesso, followed by the same light buttermilk enamel paint that I used to paint the center of the spool. After the paint was dry I used Kroma Crackle to distress the finish on the disks.  When using Kroma Crackle I do the white glue method in combination as it dries quickly that way.  You can find this white glue method along with other product how-to's for Kroma Crackle HERE.  I purchase my Kroma Crackle at Dick Blick Art Supplies.  It has to be applied thickly for the best results.  I just use my finger to spread the white glue and the Kroma Crackle.  The crackle dries white so I colored it with ink sprays in browns and greens to look mossy like the floor of the forest.  Now it was time to glue the disks to the cylinder. I first sanded the top and bottom edges of the cylinder to insure better contact.  I then glued the top and bottom to the center of the spool with glossy accents.  There is a grove cut into the top and bottom of the disks so that you know exactly where to place  them on the center part.  I squeezed my glossy accents into the grooves.  I placed an item of moderate weight, in my case a ceramic dinner plate on top of the spool until I was sure the glossy accents had dried and that my spool was put together securely.  I then covered all exposed areas of the disks with the same rock candy distress crackle paint that I used on the center piece.


A close up is here


I gave the edges a finished look by hot gluing fibers along the edges of the disks.  I love these fibers, they are very soft and look like moss.  I purchased these fibers on Etsy,  HERE


Now the fun begins!  The next step is to start gluing your embellishments! 

I personally love the look of nature inspired, but I can see this spool decorated in many different ways, and I know I'll be making more.  I have a vision of the spool dripping with pearls and lace in a gorgeous shabby chic style, maybe an elaborate fairy forest, or perhaps a fun and funky steampunk design, or even mermaids in an ocean theme.   Whatever theme you choose, have fun and please share with us on our facebook page.


Gina's Designs Products Used:


Friday, April 19, 2013

Welcome to the Gina's Designs Blog Hop

Welcome to Gina's Designs Blog Hop!


Since April 15 – 21 is World Creativity & Innovation Week, Gina's Designs decided to hold a blog hop in celebration of Creativity!  We challenge everyone to try something new and craft outside their comfort zone.  In keeping with this theme, each of our Design Team members will be unveiling a project that includes a technique that is new to them.  So hop over to each blog, check out the fun new techniques, and enter to win the prizes.

The Prize on this blog is a $10.00 gift certificate to Gina's Designs!

The requirement to be eligible (by drawing) to win the gift certificate on my blog is to follow my blog, and to leave a comment on this post telling me that you would like to win.  Remember that to be eligible for the *grand* prize you will need to visit each blog on the hop.

When you have finished the hop, be sure to go back to Gina's Designs  and leave a comment so we know you completed the hop. In order to be eligible for our grand prize you need to complete the hop, follow Gina's Designs blog (if you are not already a follower) and like Gina's Design on  Facebook. You have until 1 am central time on April 22nd to complete the hop. Have Fun and Good Luck!

For my new technique I chose to create a mixed media canvas on which I have used a new paint technique to decorate my chipboard birdbath.  How easy is this to spray paint it with a stone textured paint!  I have also outlined it with Prima chalk ink in black.  I love how it turned out and it was so easy!


 If you get lost along the way, here is a list

Gina's Designs
Marjolaine
Monica
Lisa
Angela
Marfa
Deann
Dawn
Shanna
Nancy
Rashida
Heidi
Kathi
Heather


Thursday, April 4, 2013

DT Project - Altered trinket box stand for Gina's Designs

I had so much fun altering this trinket drawer stand and I plan to use it for my collection of bird pins and brooches.  The unfinished wooden stand is available and ready to alter at Gina's Designs.  The specific link to this product is HERE.


Items used:
script tissue paper by Recollections available at Michaels
Golden soft matte gel medium
Tim Holtz curio knob
Folk art paints
white school glue used as crackle medium
Petaloo berry vines
Prima chalk edgers
All of the items on the "shelf" including the bird, nest, moss, eggs, bark, ferns etc are all from the floral dept at Joann's

Tuesday, September 18, 2012

DT Project - Vintage Bird

This piece uses lazer cut chipboard chicken wire, butterflies, and shutters.  These pieces and many others can be found at Gina's Designs, home of ready cut and custom cut lazer chipboard elements and mini albums.


Wednesday, August 29, 2012

DT Project - Vintage Victorian Shadowbox

Created for Gina's Designs, this shadowbox uses her lazer cut window pane, shutters, and awning.  I made it really old and grungy looking with an almost gothic feel.